

One of the most common questions that arise when discussing fingerstyle is if you should use nails or flesh when playing.
Nails require you to either grow out your fingernail or apply acrylics whereas flesh doesn’t require any additional maintenance except for cutting the nails.
You may be asking, what are the main differences and advantages/disadvantages between the two?
Nails
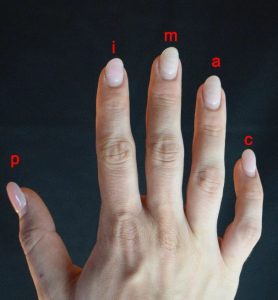
Right off the bat, nails are going to provide a brighter tone due to the material that is striking through the string. With proper shaping and filing technique the nails could provide a warmer tone. This requires several adjustments with the filing of the nail in order for the nail to come out just right for your specific right hand technique. There are many different angles & approaches but all have the same principle.
This picture demonstrates a good nail length and shaping to start with:
Flesh
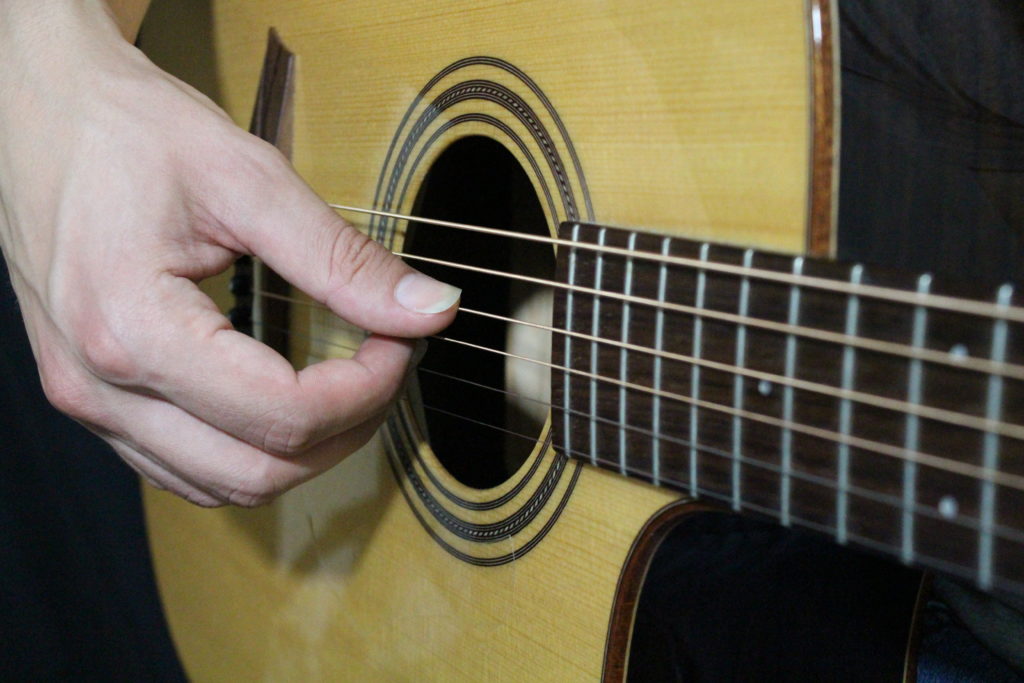
This route is the most common to start with, as it doesn’t require any additional work in order to play fingerpicking guitar. If we forget the nails and disregard any artificial product we use our flesh to fingerpick. The flesh provides a much warmer tone and less volume as well as dynamic range since it’s not likely to project as well as nails.
Here is a video on nail shaping I recommend:
Deciding on your nails or flesh is based on your personal taste and the sound that you’re trying to achieve. If you were a fingerstyle player or classical guitar player it is recommended that you at least try the nails and see if they’re a good fit for you. If you have brittle nails, there are hardening products and vitamins that can help to be able to strengthen them.
Learn more about technique through our FREE Fingerstyle Workbook!
FOLLOW US ON
Get our FREE Fingerstyle Workbook!
RELATED BLOG POSTS

Developing a Consistent Fingerstyle Rhythm
Developing a consistent fingerstyle rhythm is essential for any guitarist looking to enhance their musical expression and technical skills. A solid rhythmic foundation allows you to play more complex patterns and syncopations with ease. Here are some effective strategies to help you achieve a reliable fingerstyle rhythm.
1. Understand the Basics of Rhythm: Start by familiarizing yourself with basic rhythmic concepts, including beats, measures, and subdivisions. Learning to read sheet music or tablature can be beneficial, as it provides a visual representation of rhythms.
2. Use a Metronome: Practicing with a metronome is one of the most effective ways to develop rhythmic consistency. Begin at a slow tempo, focusing on playing each note precisely in time with the metronome’s clicks. Gradually increase the speed as you become more comfortable.
3. Break Down Patterns: Take complex fingerstyle patterns and break them into smaller, manageable sections. Practice each segment slowly, ensuring that you maintain a steady rhythm. Once you feel confident, gradually piece them together, always keeping the metronome in mind.
4. Incorporate Dynamics: Dynamics play a vital role in fingerstyle rhythm. Practice varying your attack on different strings; pluck some notes lightly and others with more force. This will help create a more engaging and expressive sound.
5. Experiment with Different Fingerpicking Patterns: Explore various fingerpicking patterns, such as Travis picking, arpeggios, or alternating bass lines. Each pattern has its unique rhythmic feel, and experimenting with them will enhance your overall rhythmic versatility.
6. Play Along with Music: Find songs that utilize fingerstyle techniques and play along. This practice helps you internalize rhythms and develop your timing. Start with simple pieces, gradually moving to more complex songs as your skills improve.
7. Record Yourself: Recording your practice sessions can provide valuable insights into your rhythm. Listening back allows you to identify areas that need improvement, helping you stay accountable to your progress.
8. Stay Relaxed: Tension can lead to a loss of rhythm. Make sure to stay relaxed while playing. Take breaks if you feel tense, and shake out your hands and fingers to release any built-up tension.
With dedication and consistent practice, developing a reliable fingerstyle rhythm will enhance your overall guitar playing. Remember, rhythmic precision is a skill that takes time to cultivate, so be patient with yourself as you progress.
Exploring Alternate Tunings for Fingerstyle Guitar
Exploring alternate tunings can significantly expand your fingerstyle guitar repertoire. By tuning your guitar differently, you can unlock new voicings, chords, and melodic possibilities. Here are some popular alternate tunings to try and how they can enhance your fingerstyle playing.
Drop D tuning (D A D G B E) is a favorite among fingerstyle guitarists. This tuning allows for easy access to powerful bass notes while maintaining familiar chord shapes. Experiment with fingerpicking patterns that emphasize the bass string, creating a rich, full sound.
Open G tuning (D G D G B D) offers a unique sonic palette. This tuning is ideal for slide guitar and folk music, allowing for smooth transitions between chords. It’s great for creating resonant melodies that ring out beautifully when fingerpicked.
DADGAD tuning is another excellent option for fingerstyle guitarists. This tuning creates a modal sound that is perfect for Celtic and folk music. It enables the use of drone notes and open strings, adding depth and resonance to your playing.
When exploring these alternate tunings, start by familiarizing yourself with the chord shapes and fingerpicking patterns unique to each. Practice switching between different tunings to discover new sounds and textures.
Experimentation is key when it comes to alternate tunings. Don’t hesitate to create your own tunings based on what inspires you. With practice, these alternate tunings can add a fresh dimension to your fingerstyle guitar playing.
Using Fingerstyle to Create Dynamic Contrasts in Playing
Fingerstyle guitar offers a unique opportunity to create dynamic contrasts in your playing. This technique allows for expressive nuances, enabling you to convey a wide range of emotions through your music. Here’s how to utilize fingerstyle for dynamic contrasts effectively.
Start by exploring the concept of palm muting. By lightly resting your palm on the strings while plucking, you can produce a softer, muted sound. This technique is excellent for creating tension in a piece, which can be released when you play louder and more freely.
Incorporate varying finger techniques to achieve different dynamics. For instance, use your thumb for deeper bass notes and your fingers for higher-pitched melodies. This contrast not only enriches your sound but also enhances the overall texture of your playing.
Experiment with articulation. Accents can be added to specific notes to create emphasis, leading to a more dynamic performance. Practice accenting the first beat of each measure or specific melody notes to draw attention to them.
Use volume swells by gradually increasing or decreasing the intensity of your playing. This can be achieved through your finger pressure and speed. Slow, gentle plucking can create a soft, delicate sound, while vigorous strumming can yield a powerful, bold tone.
Finally, practice transitioning between soft and loud passages seamlessly. This will allow you to create compelling contrasts in your music, captivating your audience and enhancing your expressive capabilities.
0 Comments