It’s essential to have the correct RH technique in order to improve in your playing. First we must focus on the right hand and the proper technique associated with it.
Having proper technique will make playing much easier and allow you to play more challenging repertoire and exercises.
Fingers and Strings
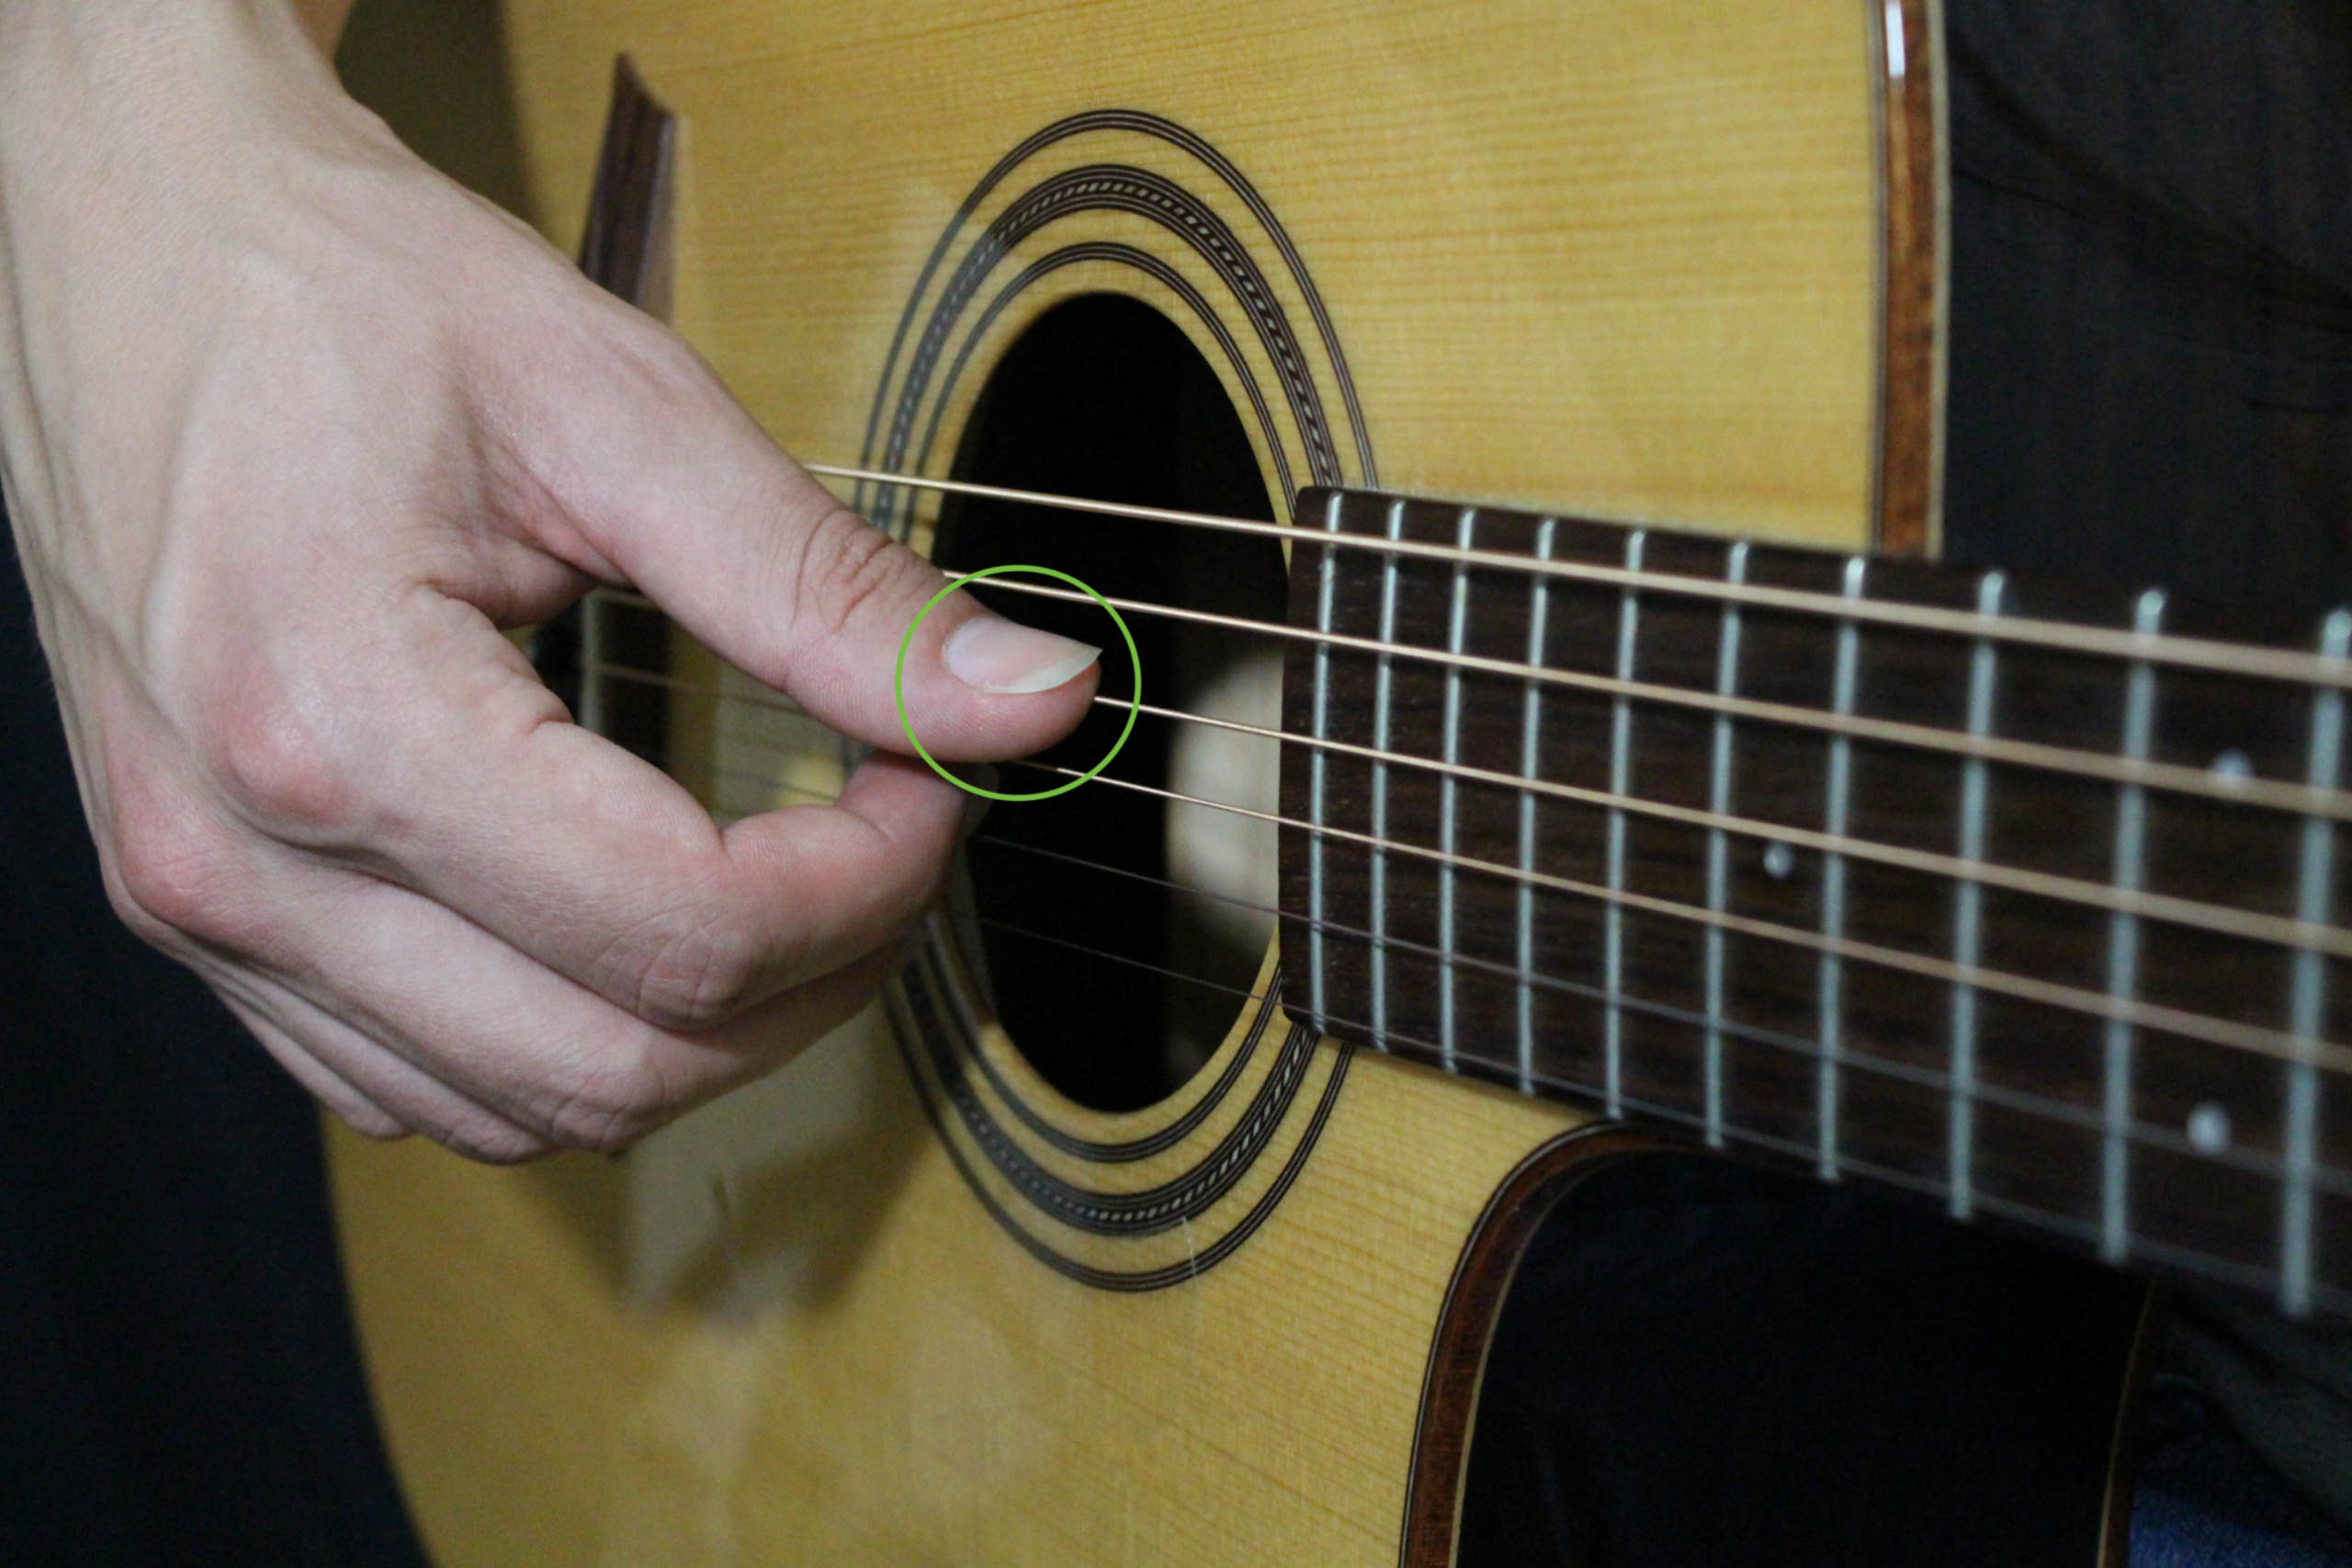
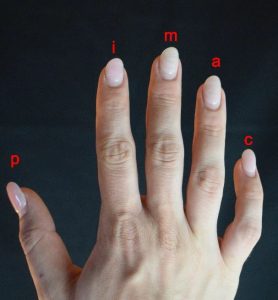
Thumb should be on the sixth, fifth, and fourth strings while the index middle ring will be on the third, second and first strings.
P = 6, 5, 4
I = 3
M = 2
A = 1
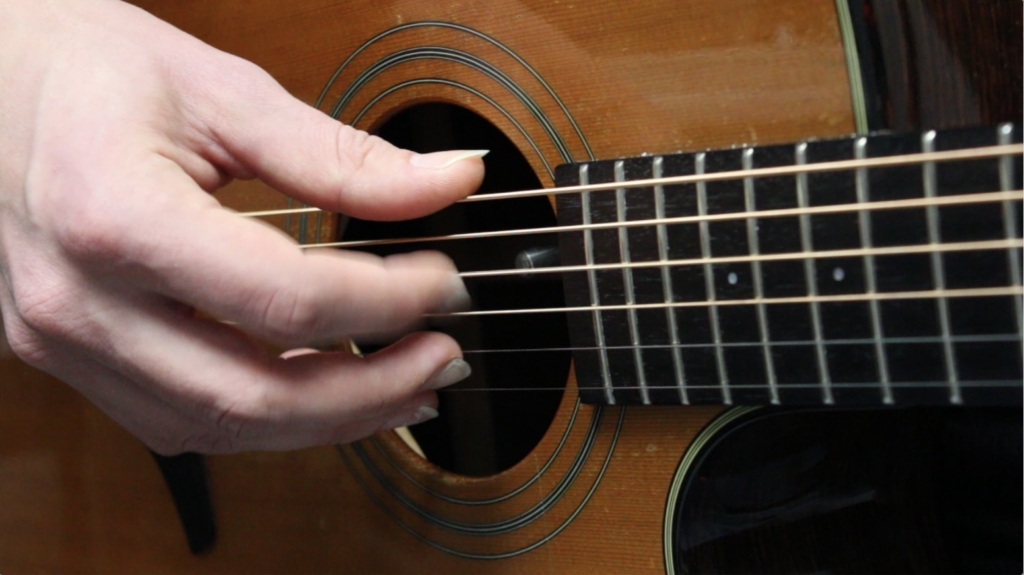
Right hand positioning
The right hand should be hovering over the sound hole in the middle. You can also place it back slightly as well for a different timbre. Make sure the right hand is relaxed while hanging over the strings.
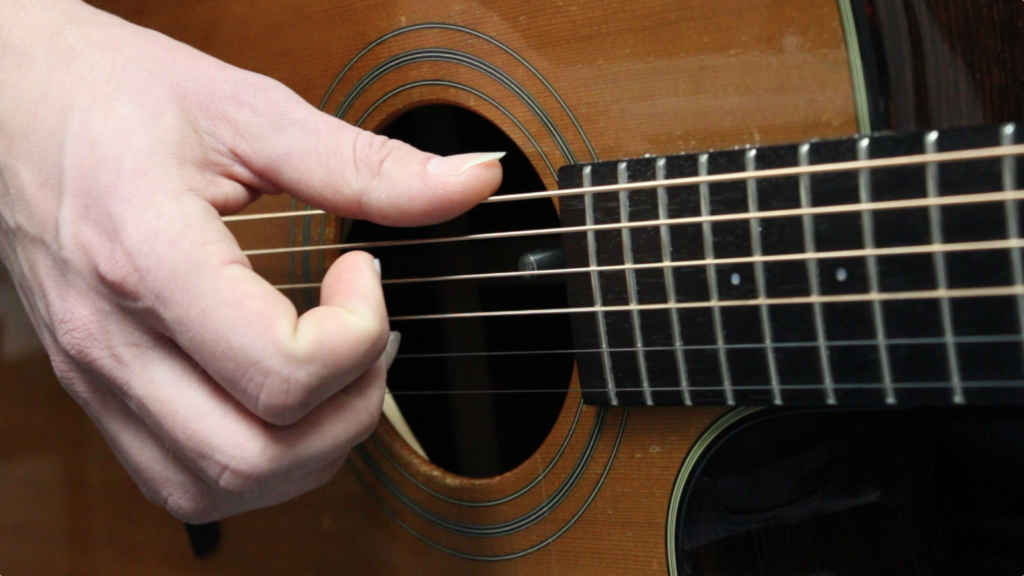
Attack motion
The attack should be a motion of the fingers coming in towards the palm. Prevent yourself from plucking up, or a clawing attack, which will cause the strings to be bright and thin.
Here is a video on beginner finger picking patterns I recommend:
Practice this with your own songs, or solely to work on your technique in order to improve your playing.
Learn more about technique through our FREE Fingerstyle Workbook!
FOLLOW US ON
Get our FREE Fingerstyle Workbook!

RELATED BLOG POSTS

Guitar Scale Practice Routine
Practicing scales is an essential part of learning to play the guitar. Scales help you develop finger dexterity, improve your knowledge of the fretboard, and enhance your ear for music. By incorporating a scale practice routine into your daily playing habits, you can improve your overall guitar skills and become a more versatile player.
To start a scale practice routine, begin by learning the basic major and minor scales in different positions on the guitar neck. Practice playing these scales slowly and evenly, focusing on proper finger placement and tone production. Use a metronome to help maintain a steady tempo and improve your sense of timing.
Once you are comfortable with the basic scales, start practicing scale sequences and patterns to increase your speed and agility on the guitar. Experiment with different scale shapes and positions to expand your knowledge of the fretboard and develop your improvisational skills.
As you progress, challenge yourself by practicing scales in different keys and modes. This will help you become more familiar with the unique characteristics of each scale and improve your ability to play in a variety of musical styles.
By incorporating scale practice into your daily routine, you can improve your overall guitar skills and become a more well-rounded player.
Guitar String Changing Tips
Changing guitar strings is a necessary task for all guitar players, but it can be a daunting process, especially for beginners. With a few tips and tricks, you can make the process of changing guitar strings quick and easy.
First, gather all the necessary tools and supplies before starting. You will need a fresh set of strings, wire cutters, and a string winder. It’s also helpful to have a tuner on hand to ensure accurate tuning after the string change.
Next, remove the old strings one at a time to prevent excessive tension on the neck of the guitar. Use the string winder to quickly unwind and remove the old strings. Take this opportunity to clean the fretboard and bridge of any dirt or debris.
When installing the new strings, start by threading the string through the appropriate tuning machine and securing it in place. Use the string winder to quickly wind the string onto the tuning machine, making sure to leave enough slack for tuning. Stretch each string gently to help stabilize tuning and prevent slipping.
Finally, tune the guitar using a tuner and stretch the strings again to help them settle into place. It’s also a good idea to check the intonation and make any necessary adjustments before playing.
By following these tips, you can change guitar strings quickly and easily, ensuring that your guitar stays in top playing condition.
Guitar Action Adjustment
The action of a guitar refers to the height of the strings above the fretboard. Proper action is essential for playability, tone, and overall comfort while playing. If the action is too high, it can be difficult to press down on the strings, leading to fatigue and intonation issues. If the action is too low, it can cause buzzing strings and poor tone.
To adjust the action of your guitar, start by measuring the string height at the 12th fret using a ruler or feeler gauge. The typical action height for an acoustic guitar is around 3-4mm, while electric guitars may have slightly lower action heights. To adjust the action, locate the truss rod adjustment at the headstock of the guitar. Tightening the truss rod will lower the action, while loosening the truss rod will raise the action.
After adjusting the truss rod, you can also adjust the bridge height to fine-tune the action. Most bridges have small screws or thumbwheels that can be adjusted to raise or lower the bridge height. Make small adjustments until the action is at the desired height.
By regularly adjusting the action of your guitar, you can ensure that your instrument plays and sounds its best.
0 Comments