

One of the most common questions that arise when discussing fingerstyle is if you should use nails or flesh when playing.
Nails require you to either grow out your fingernail or apply acrylics whereas flesh doesn’t require any additional maintenance except for cutting the nails.
You may be asking, what are the main differences and advantages/disadvantages between the two?
Nails
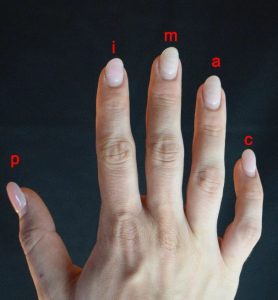
Right off the bat, nails are going to provide a brighter tone due to the material that is striking through the string. With proper shaping and filing technique the nails could provide a warmer tone. This requires several adjustments with the filing of the nail in order for the nail to come out just right for your specific right hand technique. There are many different angles & approaches but all have the same principle.
This picture demonstrates a good nail length and shaping to start with:
Flesh
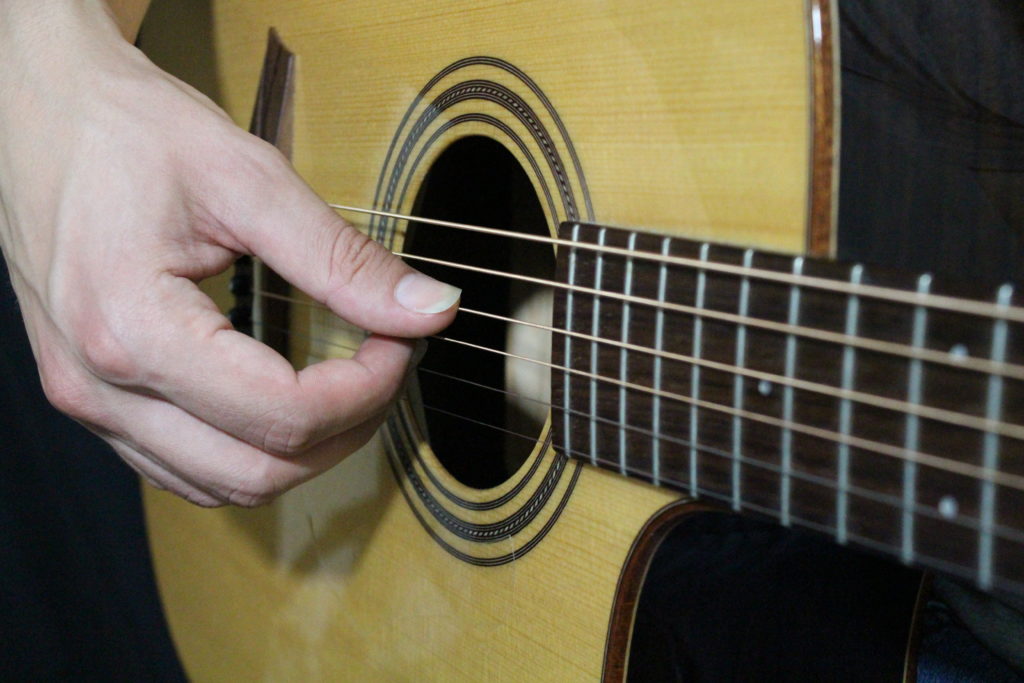
This route is the most common to start with, as it doesn’t require any additional work in order to play fingerpicking guitar. If we forget the nails and disregard any artificial product we use our flesh to fingerpick. The flesh provides a much warmer tone and less volume as well as dynamic range since it’s not likely to project as well as nails.
Here is a video on nail shaping I recommend:
Deciding on your nails or flesh is based on your personal taste and the sound that you’re trying to achieve. If you were a fingerstyle player or classical guitar player it is recommended that you at least try the nails and see if they’re a good fit for you. If you have brittle nails, there are hardening products and vitamins that can help to be able to strengthen them.
Learn more about technique through our FREE Fingerstyle Workbook!
FOLLOW US ON
Get our FREE Fingerstyle Workbook!
RELATED BLOG POSTS

Getting Started: Choosing Your First Guitar
Choosing your first guitar is an exciting yet daunting task. With countless options available, it’s crucial to find an instrument that suits your style, budget, and comfort level. The first decision you’ll need to make is whether to go for an acoustic or electric guitar.
Acoustic Guitars: These are fantastic for beginners due to their simplicity. You don’t need an amplifier, and they’re perfect for playing at home or in small gatherings. Look for a model with a solid top; this will enhance the sound quality as you play. Brands like Yamaha and Fender offer great entry-level options that won’t break the bank.
Electric Guitars: If you’re drawn to rock, pop, or blues, an electric guitar may be the way to go. While they often require additional gear like an amplifier and cables, they provide a wide range of sounds and effects. Consider starting with a beginner-friendly model from brands like Squier or Epiphone.
Size and Comfort: Regardless of the type, the guitar should feel comfortable in your hands. If possible, visit a music store to try different models. Pay attention to the neck size and body shape—these can significantly affect your playing experience.
Budget: Set a budget that allows for not just the guitar but also some essential accessories. A good starting point for a decent beginner guitar is anywhere from $150 to $500. Remember, you can always upgrade later as your skills improve.
Accessories: Don’t forget to invest in a few essential accessories. A tuner, picks, a strap, and a case will help protect your guitar and enhance your playing experience. Additionally, consider getting a guitar stand to keep your instrument safe when not in use.
Lastly, remember that your first guitar doesn’t have to be perfect. It should inspire you to play and enjoy music. So take your time, do your research, and choose an instrument that speaks to you. Happy playing!
Fingerstyle Guitar for Beginners: Essential Exercises to Build Dexterity and Accuracy
Building dexterity and accuracy is crucial for fingerstyle guitar. In this post, we will outline essential exercises that every beginner should practice to strengthen their fingers and improve overall technique.
Finger Strengthening Exercises Start with simple exercises that target each individual finger. For example, practice plucking the strings one at a time, focusing on controlled, clean movements. The goal is to build strength in your fingers so they can work independently and efficiently.
Thumb and Finger Coordination A key component of fingerstyle guitar is thumb and finger coordination. Practice alternating between your thumb and fingers, ensuring that your thumb stays steady on the bass strings while your fingers work the melody.
Using a Metronome To develop precision, practice with a metronome at a slow tempo. Gradually increase the speed as you get more comfortable with the exercises, ensuring accuracy with each note.
Stretching and Relaxation Lastly, it’s important to stretch your fingers before and after practice to avoid tension. Fingerstyle guitar requires flexibility, so keep your hands relaxed to prevent strain or injury.
Fingerstyle for Songwriters: How to Use Guitar to Enhance Your Compositions
Fingerstyle guitar can be a powerful tool for songwriters. This post will discuss how to use fingerstyle techniques to enrich your songwriting and help bring your songs to life.
Why Fingerstyle Guitar Enhances Songwriting Fingerstyle guitar allows you to create intricate and rich accompaniments that support both melody and harmony simultaneously. This can transform a simple chord progression into something more dynamic and engaging.
Combining Melody and Harmony Start by selecting a simple chord progression. Then, try incorporating the melody into your fingerpicking, adding small flourishes and embellishments. The key is to balance the melody with the bass and chords in a way that complements your song’s emotion.
Using Dynamics in Fingerstyle Manipulating dynamics (volume and intensity) is another powerful tool in songwriting. Use fingerstyle to create softer verses and more intense, louder choruses for emotional contrast within your song.
0 Comments